Cotton Candy Cookies: A Whimsical Carnival-Inspired Treat
Transport yourself to the nostalgic charm of carnival days with these dreamy Cotton Candy Cookies! These vibrant, soft, and sweet cookies are the perfect blend of playful hues and delightful flavors, making them an instant hit for parties, celebrations, or just when you need a colorful treat to brighten your day. Packed with personality, this recipe guides you through every step to create marbled cookies that taste as magical as they look. Let’s dive in!
Ingredients
For the Cookies:
- 1 cup (2 sticks) unsalted butter, softened
- Ensures a rich and creamy texture.
- 1 1/4 cups granulated sugar
- Provides sweetness while helping the cookies achieve their signature soft texture.
- 1 large egg
- Binds the dough together, giving the cookies structure.
- 1 teaspoon vanilla extract
- Adds a warm and inviting base flavor.
- 1/2 teaspoon cotton candy flavoring extract (optional)
- Elevates the nostalgic taste with that unmistakable carnival twist.
- 2 1/2 cups all-purpose flour
- The backbone of the cookies, providing just the right balance of chewiness and structure.
- 1/2 teaspoon baking powder
- Gives the cookies a gentle lift for a soft, pillowy texture.
- 1/4 teaspoon salt
- Balances the sweetness and enhances the overall flavor.
- Food coloring (pink, blue, purple, or any shades you like)
- Creates the signature cotton candy look with colorful swirls.
Instructions
Step 1: Make the Dough
- Cream the Butter and Sugar: Begin by preheating your oven to 350°F (175°C) so it’s ready when you are. In a large mixing bowl, use a hand or stand mixer to beat the softened butter and granulated sugar together until the mixture is light, fluffy, and pale in color. This process typically takes 2-3 minutes and is crucial for achieving a tender cookie texture.
- Pro Tip: Use room-temperature butter for the best results. If you’re short on time, cut the butter into small cubes to soften faster.
- Mix Wet Ingredients: Crack in the egg and pour in the vanilla extract, followed by the optional cotton candy flavoring extract. Beat the mixture until fully combined, creating a smooth, creamy base.
- Combine Dry Ingredients: In a separate bowl, whisk together the flour, baking powder, and salt. Gradually add the dry mixture to the wet ingredients, mixing slowly to avoid overworking the dough. The result should be a soft, pliable dough that’s easy to handle.
- Pro Tip: If the dough feels sticky, chill it in the refrigerator for 20-30 minutes before moving to the next step.
Step 2: Add Color Magic
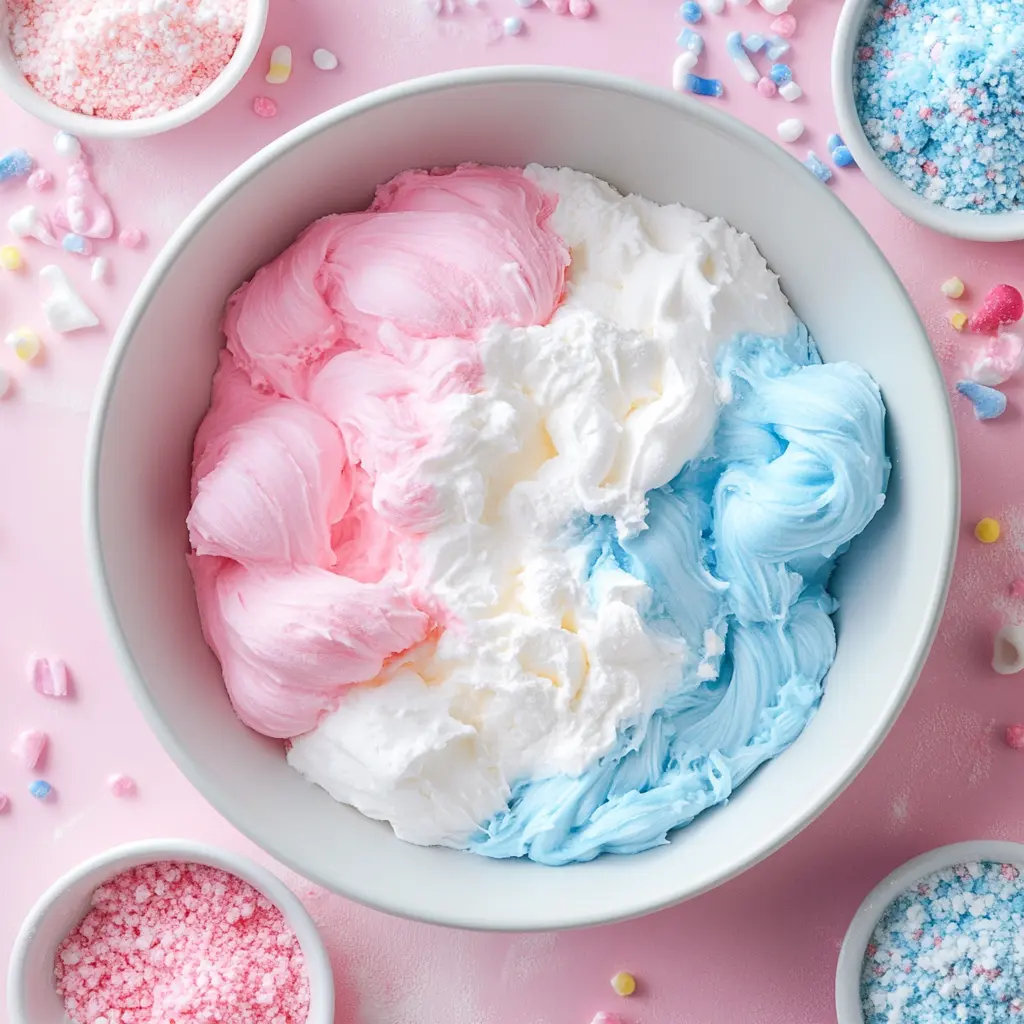
- Divide the Dough: Separate the dough into 3 or more equal portions, depending on how many colors you’d like to use. For a classic cotton candy look, stick to pink, blue, and purple. But feel free to unleash your creativity with other shades like teal, yellow, or even rainbow hues!
- Add Food Coloring: Using gel-based food coloring (preferred for its vibrant pigments), add a few drops to each portion. Gently knead or mix the dough until the color is evenly distributed. If the colors feel too pale, add an extra drop or two until you achieve the desired brightness.
- Pro Tip: Wear gloves or use a spatula to mix the colors to avoid staining your hands.
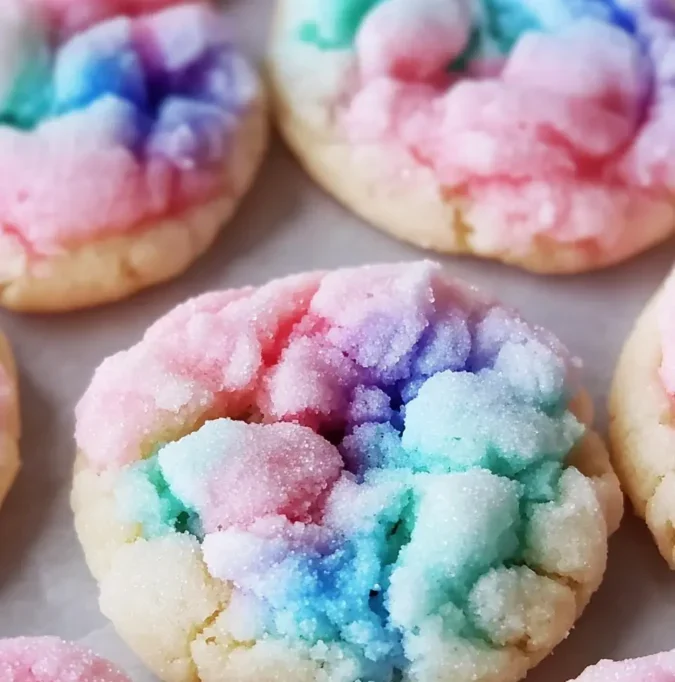
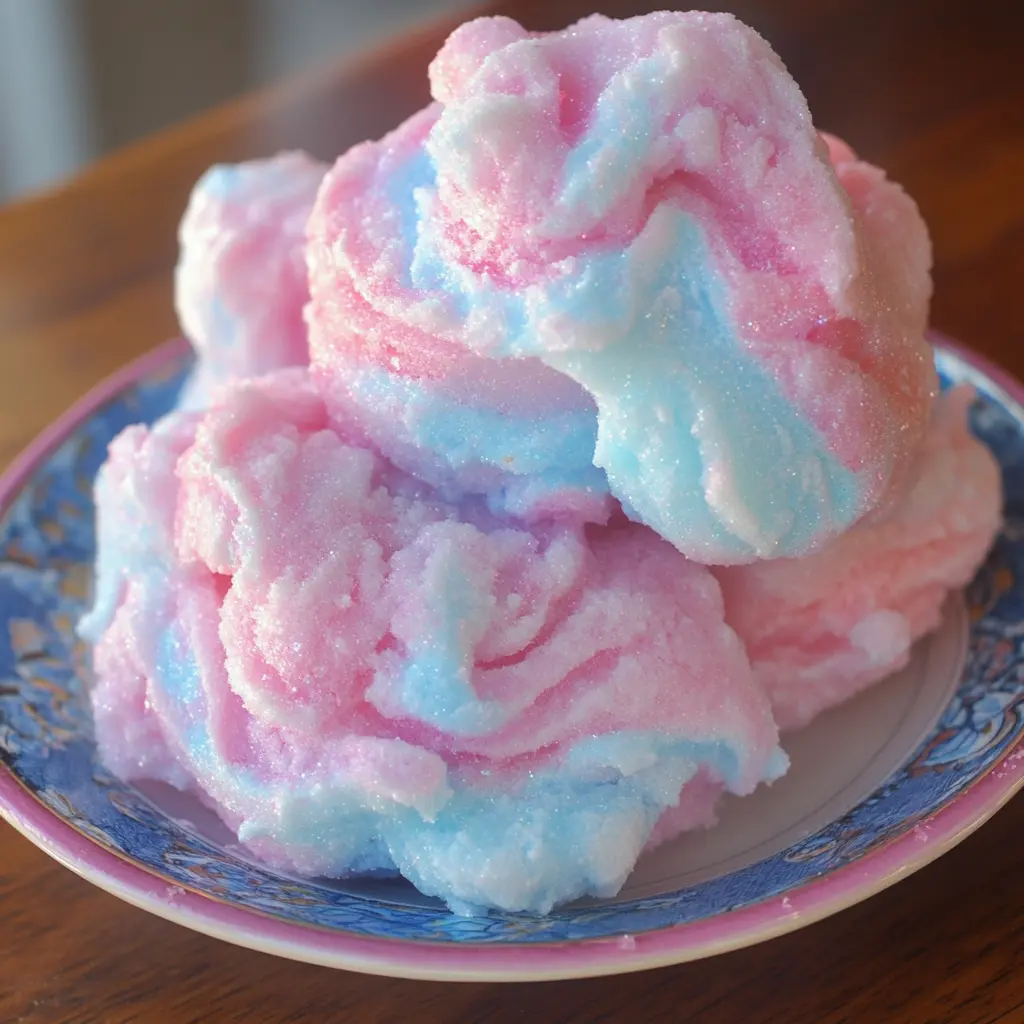
Step 3: Create Marbled Cookies
- Combine Colored Doughs: Take small pieces of each colored dough and lightly press them together to form a single ball. Be gentle to preserve the distinct colors and avoid blending them completely.
- Shape the Cookies: Roll the combined dough into balls, using about 1 tablespoon of dough per cookie. The marbled effect will be more pronounced if you keep the rolling process brief.
- Pro Tip: For a whimsical touch, roll the dough balls in sanding sugar or edible glitter before baking to give the cookies a sparkly finish.
Step 4: Bake
- Prepare Baking Sheets: Line your baking sheets with parchment paper or silicone baking mats to prevent sticking and ensure even baking.
- Bake the Cookies: Place the dough balls about 2 inches apart on the prepared baking sheets to allow room for spreading. Bake in the preheated oven for 9-11 minutes, or until the edges are set but the centers appear slightly underbaked. This ensures the cookies remain soft and chewy once cooled.
- Pro Tip: Rotate the baking sheets halfway through the baking time to ensure even cooking.
Step 5: Cool and Serve
- Cool on the Sheet: Let the cookies rest on the baking sheet for 5 minutes, then move them to a wire rack to cool completely. This helps them firm up slightly while maintaining their softness.
- Serve and Enjoy: Once cooled, your Cotton Candy Cookies are ready to delight! Their vibrant appearance and nostalgic flavor make them perfect for sharing at birthdays, baby showers, or simply indulging with a cup of tea.
Tips for Success
- Flavor Boosters: If you want to intensify the cotton candy flavor, try adding a pinch of cotton candy-flavored sprinkles to the dough. These melt slightly during baking, adding pockets of sweet, caramelized flavor.
- Customize the Colors: Match the cookie colors to your event theme! For example, use pastel shades for a spring baby shower or bold hues for a carnival-themed birthday party.
- Storage: Keep the cookies in an airtight container at room temperature, where they will stay fresh for up to 5 days. For longer storage, freeze the unbaked dough balls and bake them fresh when needed.
- Presentation Ideas:
- Stack the cookies in clear treat bags tied with colorful ribbons for party favors.
- Arrange them on a cake stand with cotton candy tufts for a whimsical dessert table centerpiece.
Why These Cookies Are Magical
Cotton Candy Cookies are more than just a dessert — they’re an experience. The marbled colors create an eye-catching visual effect that’s perfect for social media or party spreads, while the subtle cotton candy flavor takes you on a nostalgic trip back to carefree summer days. Each bite is soft, buttery, and sweet, with just enough whimsy to make you smile.
Frequently Asked Questions (FAQs)
Q: Can I make these cookies without the cotton candy flavoring?
- Absolutely! The vanilla extract alone creates a deliciously sweet base. The cotton candy flavoring is optional and simply adds an extra layer of nostalgia.
Q: Is liquid food coloring an option instead of gel?
Liquid food coloring can be used, but it tends to be less vibrant and often requires more, which might alter the dough’s texture. For rich, bold colors, gel food coloring is the preferred choice.
Q: Can I prepare the dough in advance?
Absolutely! You can make the dough up to 3 days ahead and keep it refrigerated. Before rolling and baking, allow it to sit at room temperature for a short time.
Q: Can I double the recipe?
- Definitely! This recipe scales well, so feel free to double or even triple the ingredients for larger batches.
Perfect Pairings
These Cotton Candy Cookies pair wonderfully with a variety of treats and beverages:
- Drinks:
- Serve with pink lemonade or strawberry milk for a playful, kid-friendly pairing.
- For adults, a cup of floral tea like chamomile or jasmine complements the sweetness beautifully.
- Other Treats:
- Pair with a batch of vanilla cupcakes frosted with cotton candy-colored icing for a themed dessert spread.
- Include them in a cookie platter alongside chocolate chip cookies and sugar cookies for variety.
Conclusion
Whether you’re looking to impress at your next party or simply treat yourself to a touch of whimsy, these Cotton Candy Cookies deliver on all fronts. With their soft texture, vibrant appearance, and nostalgic flavor, they’re sure to become a beloved addition to your baking repertoire. So, gather your ingredients, embrace your creativity with colors, and bake up a batch of pure happiness. Carnival vibes are just a cookie away! ✨⭐️❤️