Introduction to Breading Chicken Cutlets
Importance of Breading
Breading significantly enhances the texture and flavor of dishes, especially chicken cutlets. Learn more about what goes good with chicken cutlets here. This technique involves coating chicken in flour, eggs, and breadcrumbs before frying. Its main goal is to create a crispy outer shell that boosts the eating experience. This shell not only adds a satisfying crunch but also keeps the chicken moist and tender by sealing in juices.
Breading also greatly affects flavor. It provides a surface for herbs, spices, and other seasonings that deepen the flavor profile. The Maillard reaction during frying gives a golden brown crust with rich, savory flavors.
Moreover, chefs can choose from various breadcrumbs and seasonings to match the dish’s theme. Options range from light, airy panko to hearty Italian-style breadcrumbs, making breading a versatile technique that enhances both the look and taste of chicken.
Overall, breading is essential for improving texture, taste, and visual appeal in culinary arts, making it a key skill for chefs.
Focus on Flouring
A key question in the preparation of breaded chicken cutlets is whether flouring the meat before adding egg and breadcrumbs is necessary. Flouring is thought to help the breading adhere better to the chicken, creating a more uniform crust that doesn’t fall off during cooking. This step might also prevent the meat from drying out by sealing in moisture. However, some chefs argue that skipping flour results in a lighter, crispier texture and that proper egg application can suffice for binding the breadcrumbs. This article explores both sides of the debate to determine the benefits and drawbacks of flouring chicken cutlets.
The Role of Flour in Breading
Understanding the Function of Flour
Enhancing Adhesion
Flour significantly improves breading adherence on chicken cutlets. By dusting the chicken with flour before the egg and breadcrumb layers, chefs optimize breading stickiness and uniformity.
The Binding Role
Flour acts as a crucial binder. It creates a rough surface that grabs onto wet ingredients like beaten eggs. This adherence is better than on a bare, slick chicken surface. Flour absorbs moisture from the chicken, helping the egg wash to stick uniformly. Without flour, eggs might slide off, causing patchy breading after frying.
Barrier Formation
The flour layer also forms a barrier that keeps the chicken’s moisture away from the breadcrumbs. This prevents the breadcrumbs from getting soggy from the chicken’s juices, which would otherwise make them lose their crispness. Instead, flour turns into a paste-like barrier that supports dry, crisp breadcrumbs throughout cooking.
Flavor Enhancement
Adding spices and herbs to the flour before other layers can deepen the flavor profile. This seasoned base integrates flavors more thoroughly than seasoning only the outer crust.
In conclusion, flour is essential for perfect breading. It secures the breading, keeps it crisp, and enhances flavor. It acts as a binder, moisture barrier, and foundational flavor layer, crucial for well-prepared breaded chicken cutlets. What goes good with chicken cutlets?
Acting as a Moisture Barrier
Flour’s role extends beyond just improving adhesion—it also serves as an effective moisture barrier. This critical function helps retain the juiciness of the chicken cutlets during cooking, ensuring they come out moist and tender.
When flour coats the chicken, it seals the surface and prevents the natural juices from escaping during the frying process. As the chicken cooks, its juices are trapped beneath the flour layer, contributing to a moist interior without making the outer crust soggy. This barrier effect is crucial for maintaining the right balance between a crispy exterior and a succulent interior.
Moreover, the flour barrier helps to evenly distribute heat across the chicken’s surface. This even heating aids in consistent cooking and prevents dry spots. The retained moisture not only keeps the chicken tender but also enhances its natural flavors, making the cutlets more delicious.
By functioning as a moisture barrier, flour ensures that the chicken remains juicy and flavorful, providing a better eating experience. This makes flour an indispensable part of the breading process, not just for texture, but also for improving the overall quality of the cooked chicken.
Contributing to Even Cooking
Flour also plays a vital role in promoting uniform cooking of breaded chicken cutlets. By coating the chicken evenly in flour before adding other breading layers, it helps distribute the heat more evenly during cooking.
This even distribution of flour creates a uniform layer that acts as a heat conductor across the surface of the chicken. It prevents hot spots or areas where the breading might burn or cook too quickly compared to other parts. This is especially important in frying, where inconsistent coating can lead to uneven frying and potentially undercooked or overcooked spots.
Additionally, the flour layer works to moderate the rate of cooking. It slightly insulates the chicken, slowing down the cooking process where the meat’s thickest. This ensures that the chicken cooks thoroughly inside without the exterior becoming overly browned or crisp before the inside is done.
This consistent cooking is crucial for achieving the perfect balance of a crispy exterior and a fully cooked, tender interior. By aiding in even heat distribution and cooking moderation, flour helps maintain the quality and safety of the chicken cutlets, making each bite perfectly cooked and enjoyable.
Adding Flavor and Texture
Flour not only functions as a binder and moisture barrier but also significantly enhances the sensory attributes of chicken cutlets. By incorporating flour into the breading process, chefs can elevate both the flavor and texture of the final dish.
The texture of the chicken is markedly improved by a fine coating of flour. This base layer helps to achieve a more pronounced crispiness in the breading once fried. The flour layer crisps up during cooking, providing a satisfying crunch that contrasts beautifully with the tender chicken inside. This textural contrast is a key element in the appeal of breaded dishes.
In terms of flavor, flour acts as a foundation that can be seasoned with various spices and herbs before adding the eggs and breadcrumbs. This method infuses the chicken with deeper flavors from the inside out, enhancing the overall taste profile. The seasoned flour ensures that every bite is not only crispy but also rich in flavor, offering a more complex and enjoyable eating experience.
Moreover, flour can subtly absorb and meld the flavors of the chicken and any added seasonings, creating a harmonious blend that highlights the natural taste of the poultry. This enhanced flavor complexity makes flour an indispensable part of crafting the perfect breaded chicken cutlet.
The Breading Process Detailed
Step-by-Step Breading Guide
Preparation of Chicken
Proper preparation of chicken is crucial before starting the breading process. Here are some essential tips to ensure that the chicken is ready for a perfect breading application:
- Trimming: Begin by trimming any excess fat or cartilage from the chicken cutlets. This helps in achieving a uniform thickness, which is key for even cooking.
- Flattening: Use a meat mallet to gently flatten the croquettes to an indeed consistence. Aim for about1/4 to1/2 inch thick. This not only helps in indeed cooking but also increases the face area for further breading content.
- Drying: Pat the chicken dry with paper towels. Removing moisture from the surface of the chicken ensures that the flour adheres better, which improves the overall stability of the breading layers.
- Seasoning: Season the chicken generously with salt and pepper, and any other spices you prefer. This base layer of seasoning is absorbed directly into the meat, enhancing its flavor from within.
These preparatory steps are vital for setting the stage for flawless breading. By following these guidelines, you can achieve evenly cooked, flavorful, and perfectly breaded chicken cutlets.
Setting Up Breading Station
Organizing an efficient breading station is essential for smooth operation and consistent results in coating chicken cutlets. Check out our guide on how to make chicken cutlets without breading falling off. Here’s how to set up your station:
- Arrange the Components: Set up three shallow bowls or dishes in a row. The first bowl should contain flour mixed with your chosen seasonings such as salt, pepper, and other spices for initial coating. The second bowl will hold beaten eggs, potentially mixed with a tablespoon of water or milk to thin them slightly for a better consistency. The third bowl should have your breadcrumbs, which can be plain or seasoned with herbs and additional spices.
- Prep Your Space: Ensure that there is ample space on either side of the bowls for the raw chicken and for the breaded chicken waiting to be cooked. Having a clean workspace helps in handling the ingredients and also in maintaining hygiene.
- Use the Right Tools: Equip your station with the necessary tools—forks or tongs for dipping the chicken into the bowls, a wire rack over a baking sheet to place the breaded chicken, and extra paper towels for wiping your hands. Using forks or tongs instead of hands for dipping the cutlets can help minimize clumping of the breading materials.
- Workflow Efficiency: Organize the bowls in the order they will be used (flour, eggs, breadcrumbs) to create an assembly line for breading. This setup helps maintain a rhythm and prevents cross-contamination between the different components.
- Handling Tips: After coating the chicken in flour, tap off any excess before dipping it into the egg mixture. When transferring to the breadcrumbs, gently press the mixture onto the chicken to ensure it adheres well and creates an even layer.
- Cleanliness: Keep a damp cloth nearby to clean off any buildup on your fingers periodically. This prevents the breading from sticking to your hands instead of the chicken.
By following these steps, you can create an effective and organized breading station that ensures each chicken cutlet is evenly coated, leading to perfectly breaded outcomes every time.

Dredging in Flour
Dredging chicken in flour is the first crucial step in the breading process. Here’s a detailed guide to doing it right, along with some helpful tips:
- Choose the Right Flour: Start with all-purpose flour as it adheres well and creates a good base for the subsequent layers. You can also mix in a pinch of salt, pepper, and any desired spices to infuse flavor right from the base layer.
- Prepare the Chicken: Before dredging, ensure that the chicken cutlets are dry by patting them with paper towels. This helps the flour stick better and more evenly.
- Dredging Technique: Place the seasoned flour in a shallow bowl. Lay a chicken cutlet in the flour and scoop some over the top using your hand or a spoon. Press the flour onto both sides of the cutlet lightly but firmly to get a good coat. Shake off any excess flour gently. A uniform, light layer of flour is what you aim for, as too much flour can create a doughy texture when cooked.
- Consistency Is Key: Ensure each piece of chicken is evenly coated with flour. Inconsistent dredging can lead to uneven cooking and breading that flakes off.
- Handling Tip: Use one hand for the dry steps (like flour) and the other for wet steps (like egg dipping) to avoid clumping and ensure a cleaner breading process.
- Final Prep: Once all cutlets are dredged, they are ready to move to the egg wash. This step sets the foundation for the eggs and breadcrumbs to adhere properly, leading to a crispy and cohesive outer crust.
By following these guidelines, you ensure that the flour not only enhances flavor and texture but also improves the overall integrity of the breading. This leads to a better-cooked, more enjoyable chicken cutlet.
Egg Wash Application
Applying the egg wash correctly is a critical step in achieving a perfectly breaded chicken cutlet. Here are detailed techniques and tips to ensure optimal adherence of the egg wash:
- Prepare the Egg Wash: Beat the eggs thoroughly in a shallow bowl until they are completely blended. For a smoother, more uniform consistency, you can add a small amount of milk or water (about a tablespoon per egg). This thins the egg mixture slightly, making it easier to coat the chicken evenly.
- Dipping Technique: After dredging the chicken in flour, dip it into the egg wash. Let the excess flour from the chicken dredging step help the eggs adhere better. Use tongs or a fork to transfer the chicken to avoid mess and ensure even coating. Submerge the cutlet fully to coat all sides in the egg mixture.
- Draining Excess: Lift the chicken cutlet and let the excess egg drip off for a few seconds over the bowl. This prevents an overly thick layer of egg, which could result in a soggy breading.
- Ensuring Coverage: Check the cutlet to make sure the egg wash covers it entirely, especially in crevices or folds. The egg acts as a glue for the breadcrumbs, so complete coverage is crucial.
- Handling Tip: Use one hand for wet ingredients like the egg wash and the other hand for handling dry ingredients to keep the process clean and prevent clumping.
- Next Steps: Once the chicken is evenly coated with the egg wash, proceed to the breadcrumb station without delay. The quicker you move from egg wash to breadcrumbs, the less likely the coating is to become soggy or uneven.
By mastering the egg wash application, you create the perfect sticky base for the breadcrumbs to adhere, setting the stage for a crispy, evenly coated chicken cutlet.
Applying Breadcrumbs
To achieve a perfectly crispy and well-coated chicken cutlet, follow these best practices for applying breadcrumbs:
- Choose the Right Breadcrumbs: Select the type of breadcrumb that suits your taste; panko for a lighter, crunchier texture, or traditional breadcrumbs for a denser, heartier crust.
- Even Coating: After the egg wash, place the cutlet in the breadcrumb mixture. Press the breadcrumbs onto all surfaces of the cutlet firmly to ensure an even coat. Turn and repeat to cover thoroughly.
- Shake Off Excess: Gently shake the chicken to remove any loose breadcrumbs. This helps prevent burning of excess crumbs during cooking and ensures a clean, crisp finish.
- Resting: Let the breaded cutlets sit for 5-10 minutes before cooking. This resting period helps the coating to set and stick better during cooking.
Cooking Techniques
For cooking breaded chicken cutlets, you have two popular options: frying and baking. Discover the best oil for frying chicken cutlets here.
- Frying: Heat OilPainting in a skillet over medium heat. Fry the croquettes until golden brown on each side, icing they’re cooked through. This system gives the crisp texture.
- Baking: Preheat your roaster and place the croquettes on a baking distance. Spray or smoothly encounter with oil painting before incinerating. This system is healthier and still yields a crisp external subcaste, though slightly lower brickle than frying.
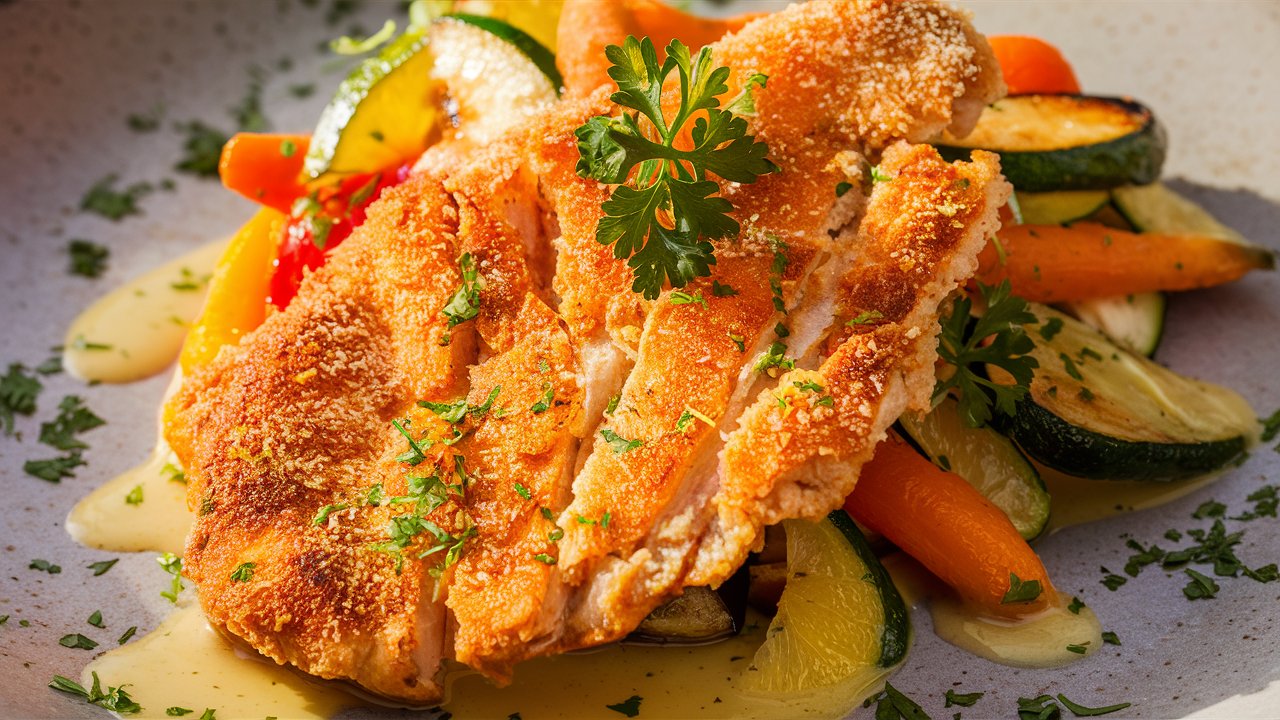
Serving Suggestions
Serve breaded chicken cutlets hot for the best texture. They pair wonderfully with a slice of lemon for a touch of acidity or a light salad for a balanced meal. Looking for inspiration? Try our Quick Kitchen Sauce ideas to elevate your dish. Sauces like marinara or aioli can also complement the dish, adding moisture and vibrant flavors.
Evaluating the Necessity of Flour
Is Flouring Essential?
Traditional Views vs. Modern Techniques
The debate between traditional and modern breading techniques often centers around the necessity of using flour. Traditionally, flour has been considered essential for achieving the perfect breaded coating. It acts as the initial layer that helps subsequent layers of egg and breadcrumbs adhere properly and provides a barrier to keep the meat juicy.
Traditionalists argue that:
- Flour creates the best foundation for a crispy crust.
- It absorbs moisture effectively, ensuring that the breadcrumbs remain dry and crisp.
- The seasoned flour layer adds depth to the flavor of the cutlets.
Modernists, however, present new perspectives:
- Many now skip the flouring step to reduce carbs or avoid gluten.
- Others claim that direct egg application on the chicken can work just as well if the chicken is dry enough.
- Modern adhesives like mustard or mayonnaise are sometimes used to bind breadcrumbs directly to the chicken, adding flavor while reducing steps.
This ongoing debate highlights a shift from strictly traditional methods to more experimental, dietary-friendly techniques in culinary practices.
Alternatives to Flour
As dietary preferences evolve, so do the ingredients used in cooking practices like breading. Here are some popular alternatives to flour:
Cornstarch:
- Offers a lighter, crispier texture than flour.
- It’s gluten-free, making it a preferred option for those avoiding gluten.
- Cornstarch can create a crunchier crust due to its ability to fry up well.
Rice Flour:
- Another gluten-free option that fries cleanly for a delicate, crispy texture.
- It is lighter than all-purpose flour and doesn’t absorb as much oil.
Almond Flour:
- Low-carb and gluten-free, almond flour adds a nutty flavor to the breading.
- It tends to brown more quickly, which can be managed by adjusting cooking times.
Chickpea Flour:
- This is a nutrient-rich alternative that adds a slight bean-like flavor.
- Popular in vegan cooking, chickpea flour also provides an extra protein boost.
Panko (Japanese breadcrumbs):
- Some chefs use panko alone for breading without a flour base, especially for a lighter, airier crust.
- Panko sticks well to wet ingredients and creates an exceptionally crunchy exterior.
Exploring these alternatives can cater to various dietary needs while still achieving delicious, crispy breaded chicken cutlets.

Frequently Asked Questions
Common Queries About Flouring Before Breading
Reasons to Flour
Flouring before breading might be necessary for several key reasons:
- Adhesion: Flour helps the egg wash and breadcrumbs adhere uniformly to the chicken, ensuring a consistent coating that doesn’t peel off during cooking.
- Moisture Barrier: It acts as a barrier to seal in the chicken’s juices, which helps keep the meat moist during cooking and prevents the breading from becoming soggy.
- Even Cooking: Flour aids in the even distribution of heat across the surface of the meat, reducing the risk of undercooked spots.
- Flavor and Texture: A seasoned flour layer can add depth and complexity to the flavor profile of the breading and contributes to a crispier crust.
What if Flour is Omitted?
Skipping the flour step can lead to several outcomes:
- Loose Breading: Without flour, the egg might not adhere as well to the chicken’s surface, causing the breadcrumbs to fall off easily.
- Uneven Cooking: There might be inconsistent cooking or breading, with some areas becoming too brown or remaining undercooked.
- Moisture Issues: The breading might absorb too much moisture from the chicken, becoming soggy rather than crispy.
Flour Alternatives
Various substitutes can replace flour in breading:
- Cornstarch: Provides a lighter, crispier texture and is gluten-free.
- Rice Flour: Another gluten-free alternative that offers a delicate crunch.
- Almond Flour: Adds a nutty flavor and is suitable for low-carb diets.
- Chickpea Flour: High in protein and adds a unique flavor while being vegan-friendly. Using these alternatives involves the same basic steps as using flour, though cooking times may vary slightly to achieve the perfect crust.
Ensuring Breading Sticks
To ensure that breading adheres properly without flour, consider the following tips:
- Dry the Chicken: Thoroughly pat the chicken dry before adding any coatings. This reduces moisture and helps the egg and breadcrumbs stick better.
- Use Mustard or Mayo: Spread a thin layer of mustard or mayonnaise on the chicken before breading. These act as effective adhesives and add flavor.
- Press Firmly: When applying the breadcrumbs, press them firmly onto the chicken to ensure they adhere well.
- Chill Before Cooking: Let the breaded chicken chill in the fridge for about 30 minutes before cooking. This helps set the breading and makes it less likely to fall off during cooking.
For a broad compilation of cooking techniques and culinary traditions that include breading and flouring as key components, Wikipedia offers detailed articles with historical and practical cooking context. Don’t miss our guide: Does chuck roast get more tender the longer you cook it? See the general entry on Cooking Techniques on Wikipedia.

Should you flour chicken cutlets before breading?
5 Stars 4 Stars 3 Stars 2 Stars 1 Star
No reviews
- Author: ava salmon
- Total Time: 25 mins
- Yield: 4 servings 1x
Description
Learn why flouring chicken cutlets before breading makes a difference. This step-by-step recipe ensures crispy, golden cutlets every time, with tips for perfect adhesion and flavor.
Ingredients
- 4 boneless, skinless chicken cutlets
- 1 cup all-purpose flour
- 2 large eggs, beaten
- 2 cups breadcrumbs (panko or Italian-style)
- 1 tsp salt
- 1 tsp black pepper
- 1 tsp paprika (optional)
- 2 tbsp grated Parmesan cheese (optional)
- ½ cup neutral oil (for frying)
Instructions
- Prep the Chicken: Trim excess fat from cutlets and gently pound to ¼-inch thickness. Pat dry with paper towels.
- Season: Sprinkle salt, pepper, and paprika on both sides of chicken.
- Set Up Breading Station: Arrange three bowls – seasoned flour, beaten eggs, breadcrumbs mixed with Parmesan (optional).
- Dredge in Flour: Coat each chicken cutlet lightly in flour. Shake off excess.
- Dip in Egg: Submerge floured chicken in beaten egg until fully coated.
- Coat with Breadcrumbs: Press breadcrumbs firmly onto chicken for an even layer.
- Rest: Place breaded cutlets on a wire rack for 10 minutes to set the coating.
- Cook: Heat oil in a skillet over medium heat. Fry cutlets 3–4 minutes per side until golden brown and internal temperature reaches 165°F.
- Serve: Remove and drain on paper towels. Serve hot with lemon wedges or dipping sauce.
Notes
- For gluten-free: Use rice flour or cornstarch instead of all-purpose flour and gluten-free breadcrumbs.
- Baking option: Preheat oven to 400°F, bake on a greased rack for 20 minutes, flipping halfway.
- Prep Time: 15 mins
- Cook Time: 10 mins
- Category: Main Course
- Method: Frying or Baking
- Cuisine: Italian-American